Anyone that knows me, knows that I am a fan of the tutu. I wasn't ever a ballerina and I'm actually not all THAT girly... but I love me a good tutu. When we found out we were having a girl, I wondered if she would be like me and usually stick to shorts or pants or if she would be that typically "girly girl" and want to wear dresses and skirts all the time. Turns out... she is sort of both. She loves playing with cars, dinosaurs, and her tool kit, but she prefers to do it while wearing a "tutu" (since any skirt or dress is apparently a tutu). She makes the perfect subject for my tutu obsession.
I also love to make things. No secret. So, combine my love of all things crafty with my slightly neurotic obsession with tutus and you have the perfect Halloween costume for a girly girl. It all started about 2 years ago when Kenzie was just over a year old. I pinned the most adorable cat costume on Pinterest and decided, "I could make that". As it turns out, that costume won Best Kids Costume at our church's annual Fall Festival. She was the most adorable cat ever, though.

As you can probably tell, my take on the tutu is "the bigger, the better". Haha! That poor kid's tutu was almost as big as her but she was thrilled! The next year I decided that while she was still of the age that I could choose her costume, I would make her the main character from my favorite movie EVER. I give you... Dorothy Gale from The Wizard of Oz. (Props to Grandma, Steven's mom, on sewing the apron to complete my vision... I like crafts but sewing is not a talent I possess.)

As Halloween has inched closer this year, we have started work on her next costume. This was her first year choosing her own costume. While it might be easy for someone to determine who she is going to be, I am not going to give it all away yet but I will tell you there is a tutu involved. I will even show you said tutu.


That's right! It's gotten bigger! We are going full-on floor length this year. There are plans to trim this so that she doesn't trip, but I'm waiting until right before Halloween just in case there happens to be some sort of major growth spurt between now and then.
Anyway, all that being said, I have been asked a few times about how I make these and I figured I would just detail it out here because it is super simple and maybe someone else wants to give it a try. I totally forgot to take pictures while I made this tutu though, so instead, I will be posting pictures of the newest one I am making. With the NFL season upon us... Kenzie needs a Dolphins tutu. This is actually going to be my first "basic" tutu but the process is very similar for this and the ones I posted above. The only difference in the hairband you use and the amount of tulle. (For example, the floor length tutu above uses 10 yards of tulle. 10. Yards. 36 feet. That's a lot of tulle...)
Anyway, I will detail how to make the basic and then give a few tips to make one like those above and what the differences are at the end.
First... what you need:
1. Tulle - I always start with... and eventually run out of and have to buy more than... roughly 5 yards total for the shorter tutus above. For this one, I started with 4 because it uses less overall.
2. Headband - This tutu uses a basic hairband but those above use the crocheted ones that you can buy at any craft store usually.
3. Paper towel roll or small chair - This is used to hold your hairband in place. For the crocheted headbands, I usually use a paper towel roll because it fits tight enough. For this one, I had to use one of Kenzie's chairs because it was slightly too big to stay put on the paper towel roll.
4. Ribbon - This is definitely optional and really only works well on the basic tutus. I have never tried to incorporate it on the ones above, but it might be possible. It is probably just too much work.

First, put the headband on something that allows it to stay in place while you work with it. Like I said, I used a chair this time but usually use a roll of paper towels.
Next, cut your tulle to size. When you buy a yard of tulle, it is folded in half. For a short tutu, I cut along that fold but for the longer one, I leave it folded and do not cut it. Then I fold the tulle so that I can cut each side and make strips. You want your strips to be approximately 1-2" wide but it isn't necessary to be perfect. I often have some about 1" and some closer to 3" just because that happens as you fold the tulle. It is easiest to have someone help you hold the tulle tight to cut it. I sometimes have Steven help and sometimes just use something to weight it on one side so it doesn't shift too much. Don't worry if you shred a few pieces as you cut. This cutting is probably the most difficult part of the entire process. And because it is tulle, it doesn't matter if it is perfect.


Take your piece of tulle and fold it in half (if you are making full length, it is already folded in half) Put the tulle piece behind the headband, folded side up or down. (It is irrelevant which way you do it, but you will probably want to do every piece in the same way so that it has uniformity in looks when you are done.) Open the folded end and loop the bottom part of the tulle through it. That might not make much sense in writing... so here are some pictures (though they leave a bit to be desired too.)


Pull the tulle tight and it should be looped around the headband. I found that with this type of headband, the tulle kept twisting so I would just adjust it and flip it around the headband to make it straight after each piece I put on to make sure it wasn't looped over or around the headband. (See pic below for what I mean by "looped around") Repeat with remaining tulle. I alternated colors with this one, but depending on what look you are going for, you can do any pattern you choose.

Once you have all your tulle on the headband and are happy with the fullness of the tutu, start wrapping the ribbon around the headband and alternate over and under every few strips of tulle. I looped it around the headband after every 4 strips. I didn't take pictures of this because it was my first time doing it, and I was so focused on what I was doing, that I forgot. Oops! It wasn't difficult though. I did learn that it is a trial and error though. I started with a length of ribbon and after a few loops realized I was not going to have enough so I had to pull more and re-adjust what I had already done. Just do not cut the ribbon until you have wrapped the entire tutu. That way you don't end up with too small a piece and waste the ribbon. This is totally an optional step by the way. It looked cute without it, but it added something fun to it.

Once you wrap the entire tutu, cut the ribbon so that you have two sides of matching length hanging. Tie that ribbon into a bow. I then trimmed it to make it the same length as the tutu.

You might notice the dark spots at the back... our kid is tiny. Well, tall... but ridiculously thin. So, I ended up tying two knots in the headband to make it fit her. It worked out well for a couple of reasons... 1. Saved me with buying more tulle. 2. Gave me a good place to loop the ribbon through and help stabilize it on each side.

And tutu! Easy enough. Pardon my model... she is a bit crazy.
Now, for a few tips on making the ones I have done for Halloween. I mentioned that I use the crocheted headbands. This means that I do three layers of tulle usually for each tutu. The only main difference is that when you loop the tulle through, you just loop it through whatever hole you want to put the layer in. It takes a lot more tulle, but it definitely makes it more full. Like I said too, I haven't figured out how to do ribbon with this one yet. I don't think it actually needs it though.


I hope that helped for anyone that has asked me how to do it recently. It's super easy and totally worth the time in my opinion. Kenzie loves these and we keep them after Halloween to use as dress up tutus.
Oh... and GO DOLPHINS!!!
I also love to make things. No secret. So, combine my love of all things crafty with my slightly neurotic obsession with tutus and you have the perfect Halloween costume for a girly girl. It all started about 2 years ago when Kenzie was just over a year old. I pinned the most adorable cat costume on Pinterest and decided, "I could make that". As it turns out, that costume won Best Kids Costume at our church's annual Fall Festival. She was the most adorable cat ever, though.

As you can probably tell, my take on the tutu is "the bigger, the better". Haha! That poor kid's tutu was almost as big as her but she was thrilled! The next year I decided that while she was still of the age that I could choose her costume, I would make her the main character from my favorite movie EVER. I give you... Dorothy Gale from The Wizard of Oz. (Props to Grandma, Steven's mom, on sewing the apron to complete my vision... I like crafts but sewing is not a talent I possess.)

As Halloween has inched closer this year, we have started work on her next costume. This was her first year choosing her own costume. While it might be easy for someone to determine who she is going to be, I am not going to give it all away yet but I will tell you there is a tutu involved. I will even show you said tutu.


That's right! It's gotten bigger! We are going full-on floor length this year. There are plans to trim this so that she doesn't trip, but I'm waiting until right before Halloween just in case there happens to be some sort of major growth spurt between now and then.
Anyway, all that being said, I have been asked a few times about how I make these and I figured I would just detail it out here because it is super simple and maybe someone else wants to give it a try. I totally forgot to take pictures while I made this tutu though, so instead, I will be posting pictures of the newest one I am making. With the NFL season upon us... Kenzie needs a Dolphins tutu. This is actually going to be my first "basic" tutu but the process is very similar for this and the ones I posted above. The only difference in the hairband you use and the amount of tulle. (For example, the floor length tutu above uses 10 yards of tulle. 10. Yards. 36 feet. That's a lot of tulle...)
Anyway, I will detail how to make the basic and then give a few tips to make one like those above and what the differences are at the end.
First... what you need:
1. Tulle - I always start with... and eventually run out of and have to buy more than... roughly 5 yards total for the shorter tutus above. For this one, I started with 4 because it uses less overall.
2. Headband - This tutu uses a basic hairband but those above use the crocheted ones that you can buy at any craft store usually.
3. Paper towel roll or small chair - This is used to hold your hairband in place. For the crocheted headbands, I usually use a paper towel roll because it fits tight enough. For this one, I had to use one of Kenzie's chairs because it was slightly too big to stay put on the paper towel roll.
4. Ribbon - This is definitely optional and really only works well on the basic tutus. I have never tried to incorporate it on the ones above, but it might be possible. It is probably just too much work.

First, put the headband on something that allows it to stay in place while you work with it. Like I said, I used a chair this time but usually use a roll of paper towels.
Next, cut your tulle to size. When you buy a yard of tulle, it is folded in half. For a short tutu, I cut along that fold but for the longer one, I leave it folded and do not cut it. Then I fold the tulle so that I can cut each side and make strips. You want your strips to be approximately 1-2" wide but it isn't necessary to be perfect. I often have some about 1" and some closer to 3" just because that happens as you fold the tulle. It is easiest to have someone help you hold the tulle tight to cut it. I sometimes have Steven help and sometimes just use something to weight it on one side so it doesn't shift too much. Don't worry if you shred a few pieces as you cut. This cutting is probably the most difficult part of the entire process. And because it is tulle, it doesn't matter if it is perfect.


Take your piece of tulle and fold it in half (if you are making full length, it is already folded in half) Put the tulle piece behind the headband, folded side up or down. (It is irrelevant which way you do it, but you will probably want to do every piece in the same way so that it has uniformity in looks when you are done.) Open the folded end and loop the bottom part of the tulle through it. That might not make much sense in writing... so here are some pictures (though they leave a bit to be desired too.)


Pull the tulle tight and it should be looped around the headband. I found that with this type of headband, the tulle kept twisting so I would just adjust it and flip it around the headband to make it straight after each piece I put on to make sure it wasn't looped over or around the headband. (See pic below for what I mean by "looped around") Repeat with remaining tulle. I alternated colors with this one, but depending on what look you are going for, you can do any pattern you choose.

Once you have all your tulle on the headband and are happy with the fullness of the tutu, start wrapping the ribbon around the headband and alternate over and under every few strips of tulle. I looped it around the headband after every 4 strips. I didn't take pictures of this because it was my first time doing it, and I was so focused on what I was doing, that I forgot. Oops! It wasn't difficult though. I did learn that it is a trial and error though. I started with a length of ribbon and after a few loops realized I was not going to have enough so I had to pull more and re-adjust what I had already done. Just do not cut the ribbon until you have wrapped the entire tutu. That way you don't end up with too small a piece and waste the ribbon. This is totally an optional step by the way. It looked cute without it, but it added something fun to it.

Once you wrap the entire tutu, cut the ribbon so that you have two sides of matching length hanging. Tie that ribbon into a bow. I then trimmed it to make it the same length as the tutu.
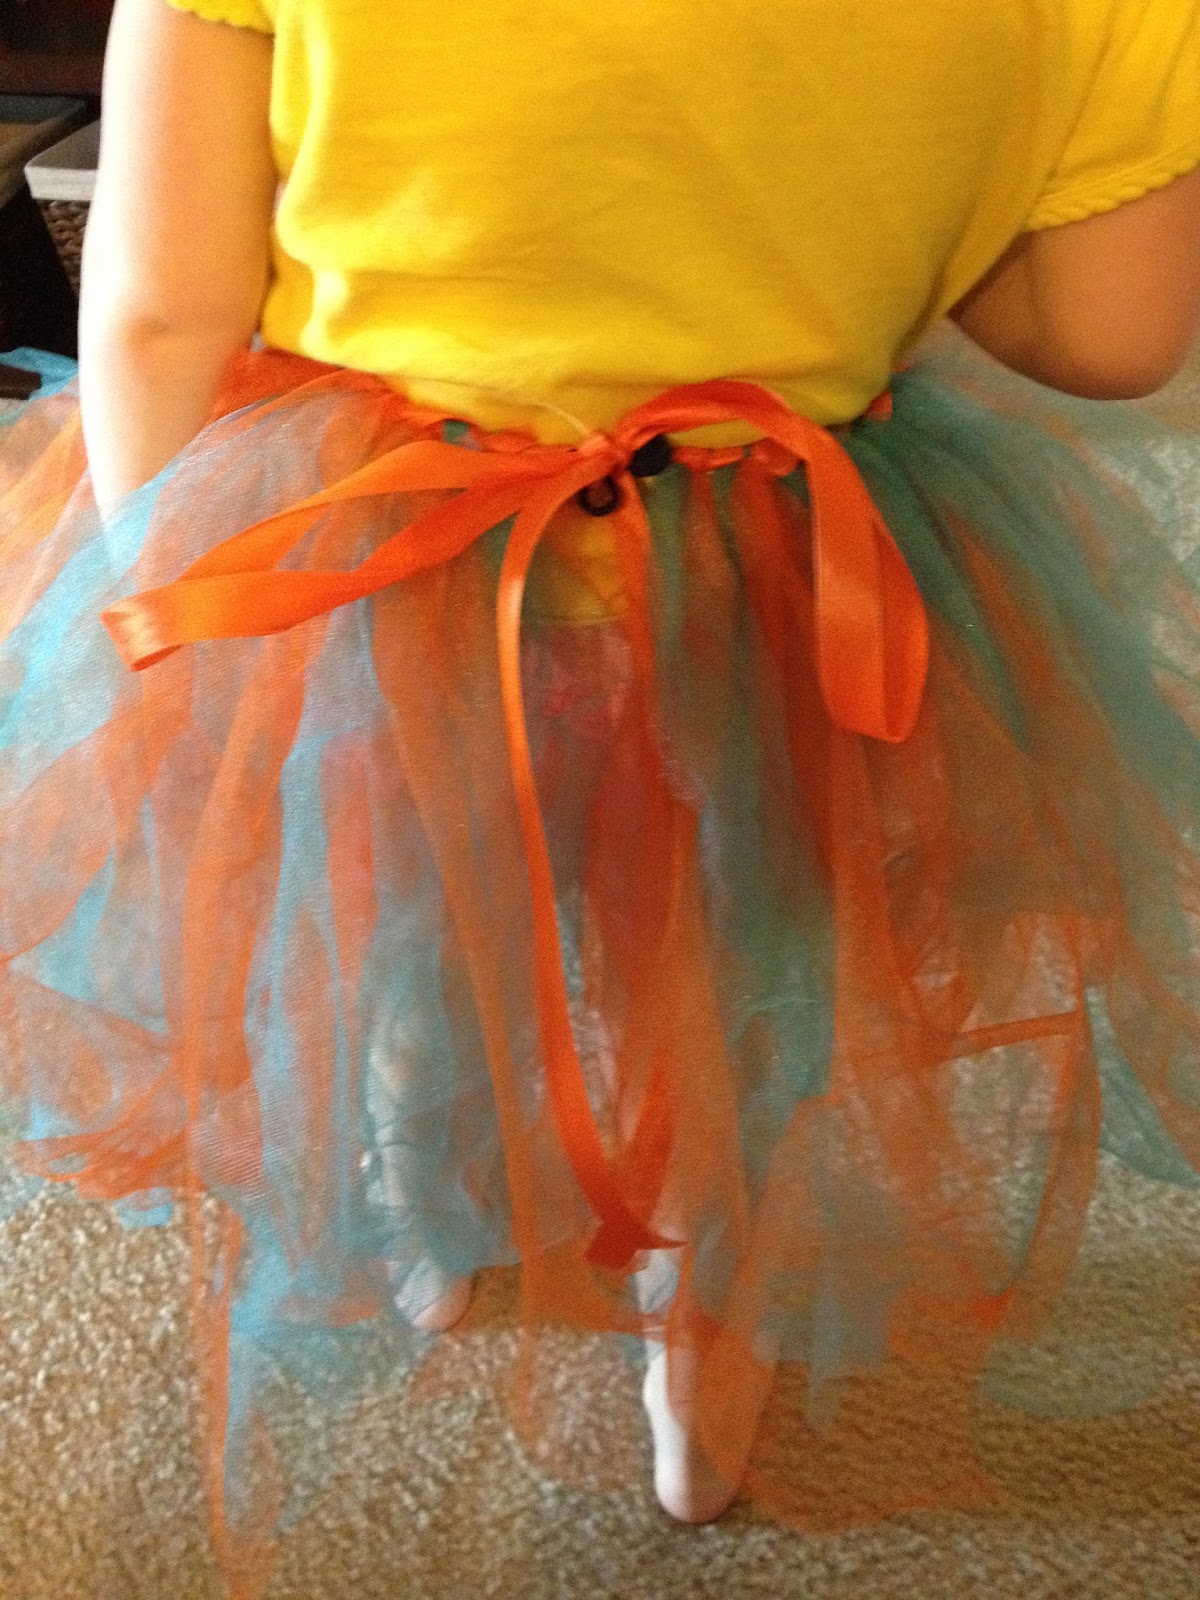
You might notice the dark spots at the back... our kid is tiny. Well, tall... but ridiculously thin. So, I ended up tying two knots in the headband to make it fit her. It worked out well for a couple of reasons... 1. Saved me with buying more tulle. 2. Gave me a good place to loop the ribbon through and help stabilize it on each side.

And tutu! Easy enough. Pardon my model... she is a bit crazy.
Now, for a few tips on making the ones I have done for Halloween. I mentioned that I use the crocheted headbands. This means that I do three layers of tulle usually for each tutu. The only main difference is that when you loop the tulle through, you just loop it through whatever hole you want to put the layer in. It takes a lot more tulle, but it definitely makes it more full. Like I said too, I haven't figured out how to do ribbon with this one yet. I don't think it actually needs it though.


I hope that helped for anyone that has asked me how to do it recently. It's super easy and totally worth the time in my opinion. Kenzie loves these and we keep them after Halloween to use as dress up tutus.
Oh... and GO DOLPHINS!!!
Comments
Post a Comment